


What You Should Know Before Repotting an Orchid
Author: Melanie Dearringer1 Comment
Repotting is an important and rewarding part of orchid maintenance. You should be neither fearful or too anxious to repot your plant. This article will help you understand exactly why we repot orchids and what kind of preparations are needed.
Reasons to Repot
Orchids should not be repotted without a good reason. Those reasons include:
- The plant has grown too large for its current container
- The potting medium has deteriorated
- The plant has contracted a disease or is pest infested
- The orchid is suffering from over-fertilization
- You suspect the orchid is suffering from root rot
Repotting without a compelling cause can lead to unnecessary stress on your plant.
When to Repot
It is best to repot an orchid after it has finished blooming and the active growth stage has begun. Orchids begin to produce new roots and leaves during this period of time. Repotting during active growth helps the orchid grow into its new potting medium quicker. However, if you are dealing with a situation such as pest infestation, root rot, or over-fertilization, you must act immediately to preserve the health of your plant.
Once you have determined that it is imperative to repot your orchid and the timing is right, there are a few things you need to do prior to removing the plant from its current pot.
Select New Potting Medium
The point of repotting an orchid is to refresh its living conditions. That means out with the old potting mix and in with the new. There are many different types of suitable potting mixtures on the market. You should choose one based on your watering habits. If you tend to over-water your plants, choose a bark mixture which dries out faster. Alternatively, if you have a habit of under-watering or neglecting your orchid, choose a medium like peat moss that will retain moisture for longer periods of time.
Potting medium that contains bark should be soaked for 24 hours prior to repotting to allow the mixture to absorb the water. Because bark tends to dry out faster, it will require a longer prep time. Peat moss can simply be thoroughly rinsed prior to repotting.
Choose a Container
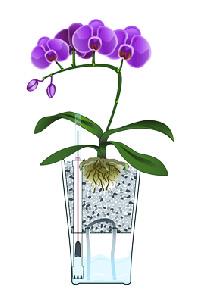
-Water reservoir
(click photo for planter info)
When choosing a new container for your orchid, you should determine why you are repotting the plant. If it has outgrown its current container, you will want to choose one that is roughly 2″ larger than its current pot to accommodate a year or two worth of new growth. If a pest infestation, fertilization problem, or root rot has you repotting your orchid, you may be able to get away with using the same size container. Orchid roots prefer to be potted snug. Choosing a container that is too large for the plant will actually be to the plant’s disadvantage. Larger containers tend to stay wet for longer periods of time, which can lead to rot. Be sure to pot for your orchid’s root mass and not its foliage size.
We recommend using a clear, plastic pot with adequate drainage holes. A clear pot allows you to easy see the health of the roots and determine the status of the potting medium deep within the container. Potting mix is dark in color when it is wet and will gradually lighten as it dries. While the mixture may appear to be dry on the surface, it may still be retaining moisture deeper.
Don’t like the look of a clear, plastic pot? They can be easily placed in decorative containers to suit your taste. Just be sure to create a water reservoir in the bottom of the planter to catch water that drains from your clear, plastic pot. It is also important that your roots are not left to sit in the water collecting below.
Gather the Proper Equipment
You will need a pair of sharp, sterilized scissors. Sterilize the scissors with bleach or fire. Working with clean, sterilized tools will help minimize the spread of disease from plant to plant. A stake may also be necessary to stabilize your newly potted orchid. Allowing the orchid to wobbly within the container can damage its fragile root system. You can use a bamboo stake or galvanized metal wire to accomplish this. Finally, be sure you have some cinnamon on hand. Cinnamon is a fantastic natural fungicide and should be used to treat any cuts made to the plant.
Once you have gathered all of the above, you are ready to begin repotting your orchid. For step by step instructions on how to repot your orchid, see The Right Way to Repot an Orchid.
Featured image photo credit: liz west via http://www.flickr.com/photos/calliope/4407139694/
If you enjoyed this, please share it!


One response on “What You Should Know Before Repotting an Orchid”
Leave a Reply


Ask an Expert
Questions about orchids?
Our experts love a challenge!

Busono
Oncidium
Photo of the Week
Submit your photo to be featured on the blog!
More Photo of the Week Winners
Submit Photo
Some guidance, pls, about removing air roots and other out-of-pot roots. You may guess that my orchids were rather overdue for repotting. I procrastinated because limited previous experience had tragic results. This year, did more research and 3 out of 3 are doing swell in new larger accomodations. One remains. It’s in a window above the kitchen sink & is covered in dead-looking “air roots” desperately trying to reach sink faucet. (no worry–they get plenty of water.)